

Hey there! Have you ever thought about how cool it would be to have your own AI assistant, like Siri or Alexa, but one that you made yourself?
Well, you’re in the right place!
In this blog, we’re going to show you how to create your very own AI assistant using some awesome tools called GPTs and Zapier.
So, what are GPTs and Zapier? GPTs, or Generative Pre-trained Transformers, are super smart AI models that can understand and generate text just like a human. Zapier, on the other hand, is a tool that helps you connect different apps and automate tasks without needing to know how to code. Together, they make a powerful combo for building an AI assistant that can do all sorts of cool things.
In this blog series, we’ll break everything down into simple steps so you can follow along easily. We’ll start by setting up your GPT model and teaching it to handle specific tasks. Then, we’ll show you how to use Zapier to connect your AI assistant with other apps and services, making it even more useful.
You’ll learn about the different parts that make up an AI assistant, like how it understands what you say and how it responds. We’ll also give you tips and tricks to make your AI assistant even better.
By the end of this series, you’ll have your very own AI assistant that can help you with all sorts of things, from answering questions to automating tasks. So, let’s dive in and start building your AI assistant with GPTs and Zapier! It’s going to be a fun and exciting journey!
Step 1: Create Your Custom GPT
Log in to ChatGPT: Head over to chat.openai.com and log in to your account.
Go to GPT Builder: Click on the “Explore” button on the sidebar and then select “Create a GPT”.
Set Up Your GPT: Give your GPT a name, description, and even a cool profile picture. This helps you identify it easily later.
Step 2: Add Zapier Actions to Your GPT
Open Configuration: In the GPT Builder, click on the “Configure” tab.
Add New Action: Scroll down to find the “Add Actions” button and click on it.
Import Zapier API: You’ll need to import Zapier’s API. Use this URL:
https://actions.zapier.com/gpt/api/v1/dynamic/openapi.json?tools=meta. Paste it into the "Import from URL" field and hit "Import".
Step 3: Set Up Actions in Zapier
Log in to Zapier: Go to Zapier and log in to your account.
Create a New Action: Navigate to the Zapier Action Dashboard at
https://actions.zapier.com/gpt/actions/and click on "Create New Action".Configure Your Action: For example, if you want to send an email, select “Gmail: Send Email”. Link your Gmail account and configure the action as needed.
Enable the Action: Give your action a custom name and enable it. Copy the action’s URL.
Step 4: Link Zapier Actions to Your GPT
Back to GPT Configuration: Return to the GPT Builder and paste the action’s URL into the instructions field of your GPT.
Define Actions: Specify what actions your GPT should perform. For instance, you can set it to send an email when prompted.
Test Your Setup: Try out a command to see if everything works. For example, ask your GPT to send an email and check if it goes through.
Step 5: Share and Use Your Custom GPT
Save and Share: Once you’re happy with your setup, save your GPT. You can share it with others by copying the link from the “Explore” tab.
Collaborate: If you’re sharing with teammates, they’ll need to authorize their own Zapier accounts to use the actions.
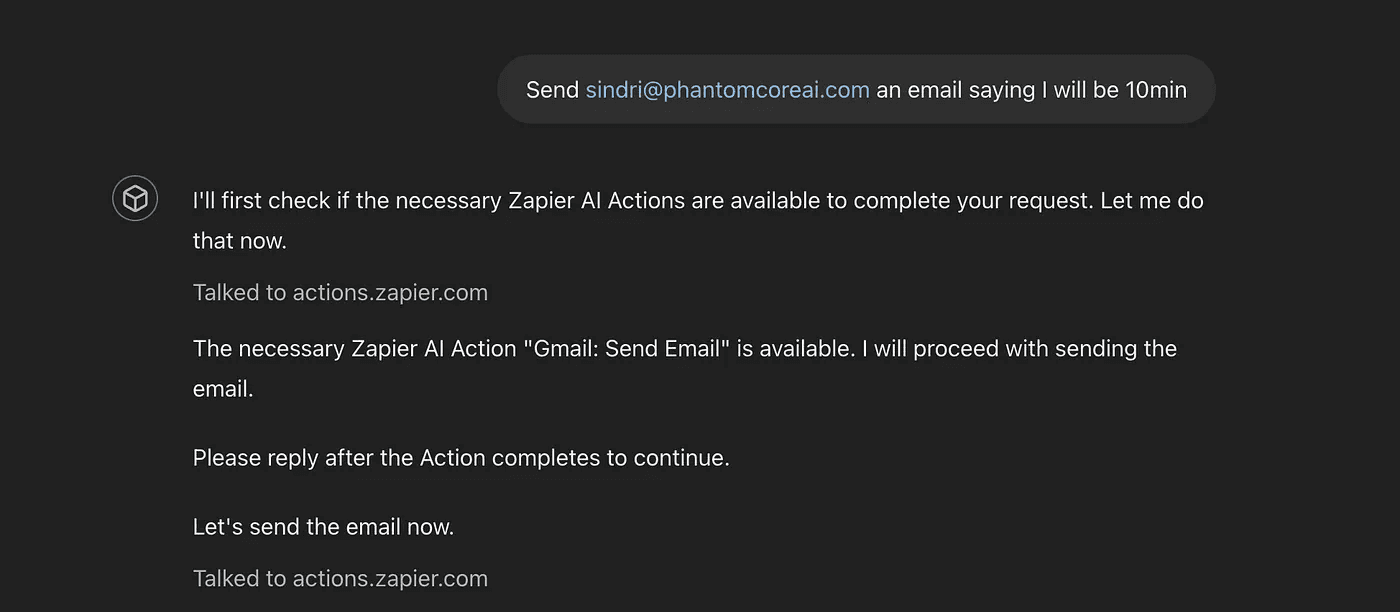
How to send an email
Create a New Action: Navigate to the Zapier Action Dashboard at
https://actions.zapier.com/gpt/actions/and click on "Create New Action".Configure Your Action: Select “Gmail: Send Email”. Link your Gmail account and configure the action to send an email.
Enable the Action: Name your action and enable it. Copy the action’s URL.
Back to GPT Configuration: Return to the GPT Builder and paste the action’s URL into the instructions field of your GPT.
Define Actions: Specify what actions your GPT should perform. For instance, you can set it to send an email when prompted.
Test Your Setup: Try out a command to see if everything works. For example, ask your GPT to send an email and check if it goes through.
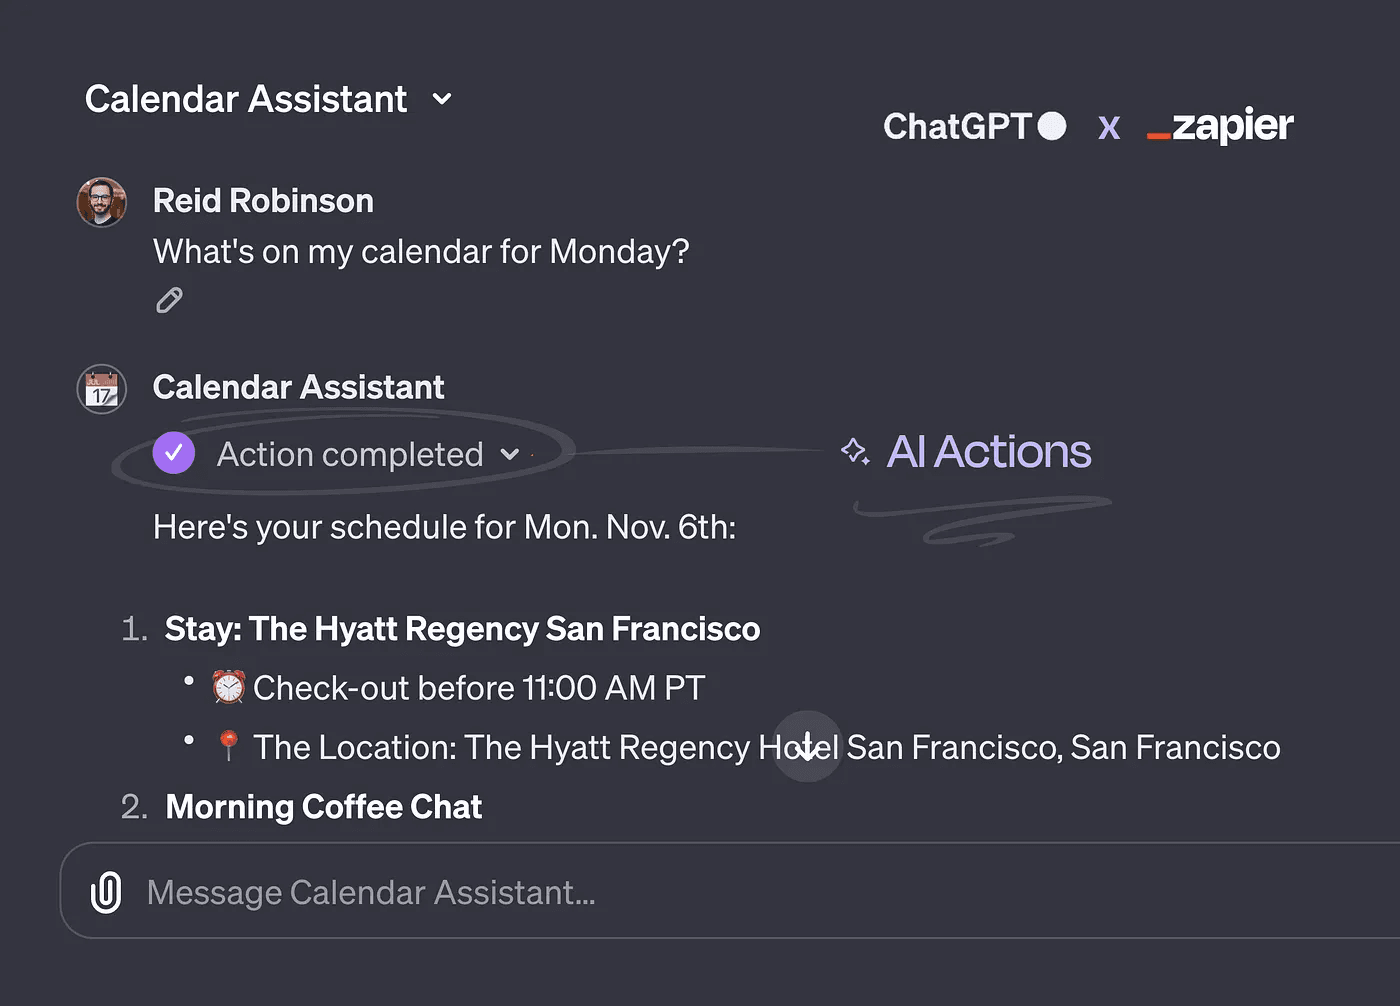
How to ask it about your schedule
Create a New Action: Navigate to the Zapier Action Dashboard at
https://actions.zapier.com/gpt/actions/and click on "Create New Action".Configure Your Action: Select “Google Calendar: Find Event”. Link your Google Calendar account and configure the action to find events for today.
Enable the Action: Name your action and enable it. Copy the action’s URL.
Back to GPT Configuration: Return to the GPT Builder and paste the action’s URL into the instructions field of your GPT.
Define Actions: Specify what actions your GPT should perform. For instance, you can set it to retrieve today’s events from Google Calendar.
Test Your Setup: Try out a command to see if everything works. For example, ask your GPT to tell you your schedule for today and check if it retrieves the events correctly.
Tips and Tricks
Customization: You can customize your GPT to handle various tasks like creating calendar events, sending Slack messages, and more.
Testing: Always test your actions to ensure they work as expected.
Documentation: Refer to Zapier’s AI Actions Documentation for detailed guidance.
And there you have it! By following these steps, you can connect Zapier actions to your custom GPT and automate a ton of tasks, making your life a whole lot easier. Happy automating!
Video Version Of This Blog
Check out my YouTube Channel
Follow us at our website: Phantom Core AI
Join our AI Systems Hub to learn the AI Systems we have implemented for 9 figure companies to help save time & generate millions in additional revenue!


